Showing posts with label Andriod. Show all posts

Friday, August 2, 2024

How To Compress Images on Android Without Losing Quality

August 02, 2024 0

 Do you use your phone camera very often to click selfies or photos? All those image files consume lots of memory in your Android smartphone. We have some of the best tricks for Android users to compress images without losing quality.

You can compress images to save storage space or for easy sharing. Below, we have shared a few of the best workarounds for compressing images without losing quality on Android.

1. Compress Images with Puma Photo Resizer

Puma Photo Resizer is a free Android app on the Google Play Store. The app lets you resize or compress your selected images. Here’s how you can use the app to compress images on Android.

1. Download & install the Puma Photo Resizer app on your Android device.
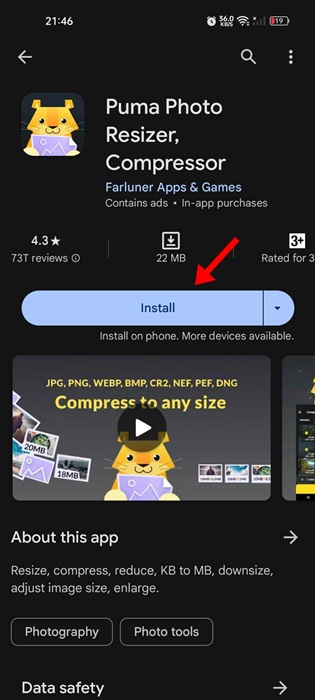
Puma Photo Resizer

2. Once the app is downloaded, open it and click the Skip button at the bottom left corner.
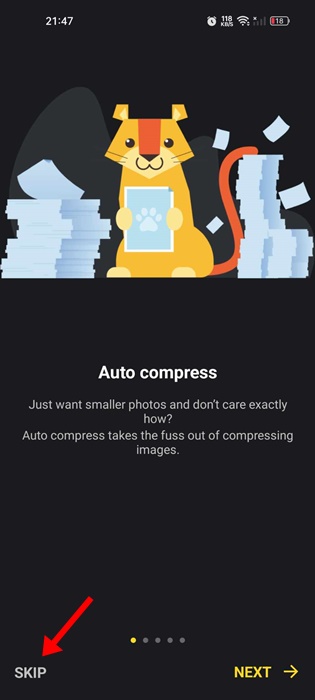
Skip

3. Now, the app will ask you to grant access to the Photos & Videos of your device. Grant the permission.
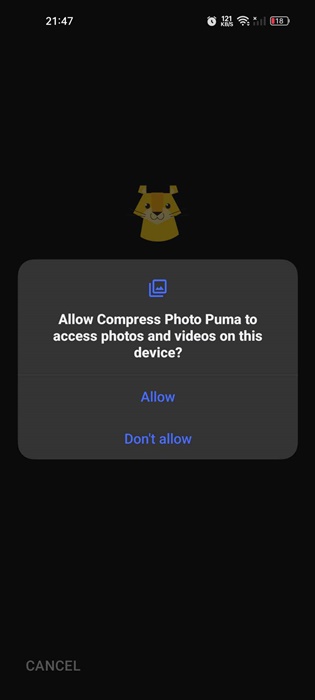
grant the permission

4. Now, you will see the main interface of the app. Select the photos you want to compress and tap on the Compress button.
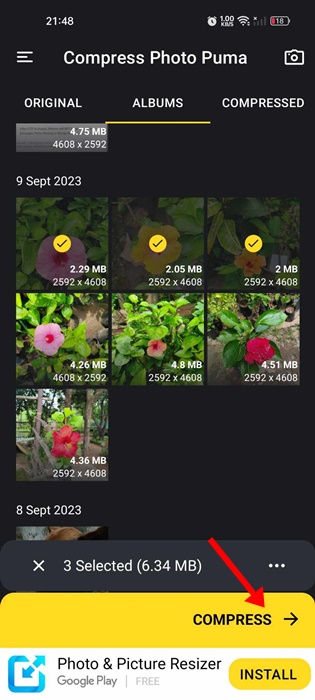
Select the photos

5. In compression mode, select File Size if you want to reduce the size of your photos, and click Next.
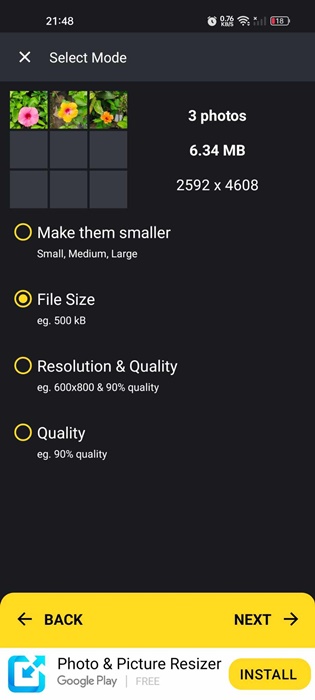
File Size

6. Select the output file size and click Next.
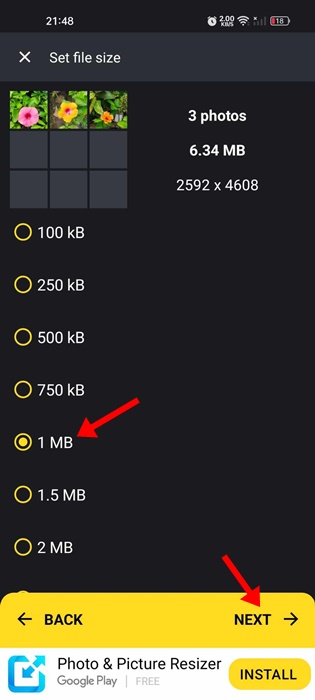
output file size

7. Now, wait a few seconds until the app compresses your photos.
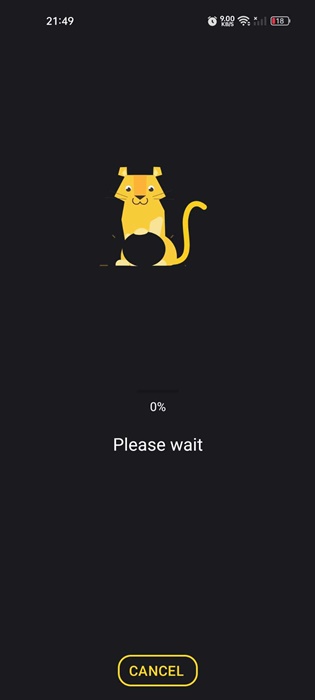
wait a few seconds

8. Once compressed, tap on Save at the bottom right corner.
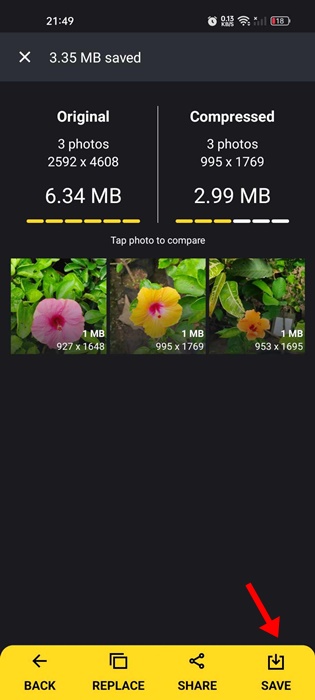
Save

2. Compress Images Using Compress Image

Low on storage? But you don’t want to delete your precious images; compress them! It is a simple app that compresses images in just one tap. It is one of the new Image compressor tools that can compress your photos up to 97% without compromising the quality.

1. Download & install Compress Image on your Android smartphone. Open the app and tap the Gallery icon at the bottom.
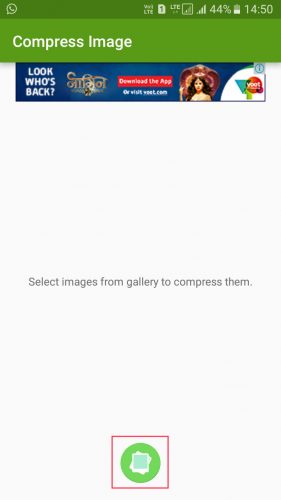
Using Compress Image

3. In the next step, select the images you want to compress.
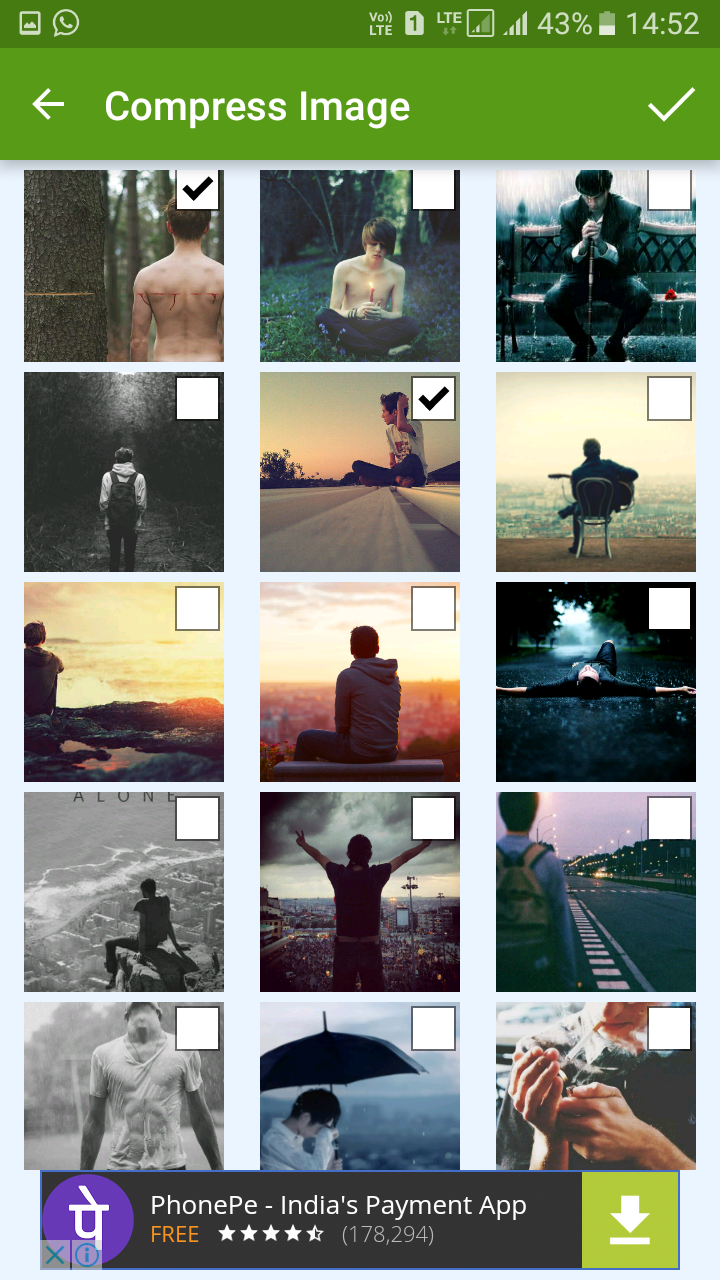
Using Compress Image

4. Now, tap the tick button and wait for the app to compress the selected images. Once compressed, you will see the screen below.
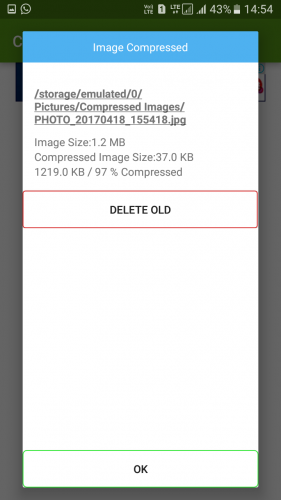
Using Compress Image

Best Apps to Compress Images on Android

Like the three we have used, many similar apps are available on the Google Play Store. You can use those apps to compress Android images without losing quality. Here are some of the best apps for compressing images.

1. Photoczip – compress resize
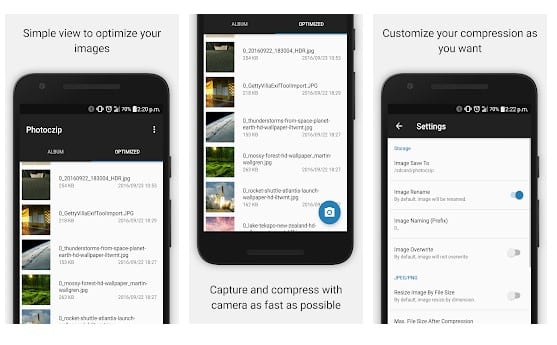
Photoczip

Photoczip – Compress, resize, and zip all photos in one step. This app is a simple and handy tool to compress large photos on your smartphone/tablet. It can compress pictures to less than 100KB in one step. It can even convert PNG to JPG.

2. Photo & Picture Resizer
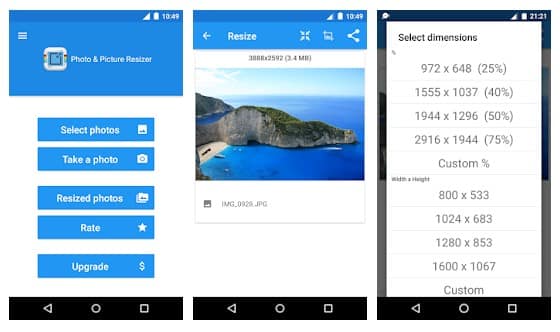
Photo & Picture Resizer

The easy-to-use Image Resizer helps you quickly reduce your picture size or resolution. Resizer allows you to promptly reduce photo size without losing quality.

You don’t have to manually save resized pictures because they are automatically saved in a separate folder titled’ Pictures/PhotoResizer’ and are accessible via the built-in Gallery app.

3. Reduce Photo Size
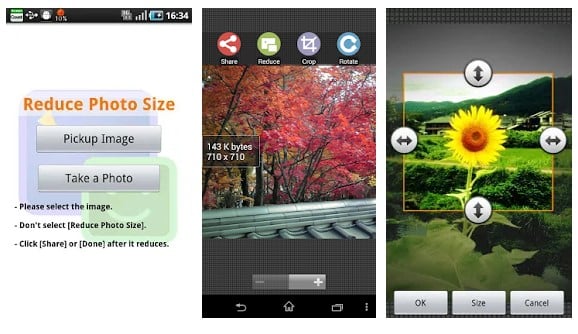
Reduce Photo Size

This is another excellent Android app that helps you reduce photo file size so you can use it for Email, Twitter, and Facebook sharing.

The best thing about this app is that you will hardly notice any influence in the original photo, even if the image is reduced with this.

4. Photo & Picture Resizer
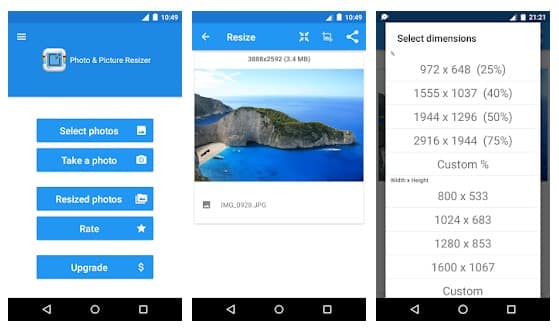
Photo & Picture Resizer

The easy-to-use Image Resizer helps you quickly reduce your picture size or resolution. Smart Image Resizer is a perfect choice to quickly reduce the picture size or resolution. Photo Resizer allows you to promptly reduce photo size without losing quality.

5. Image Compress
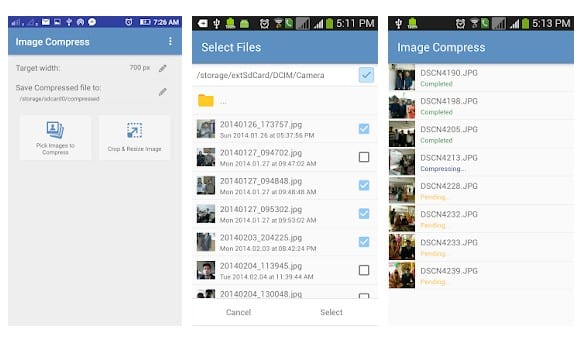
Image Compress

This is another best Android app that helps you compress or resize images based on size and quality. As we know, photos captured with an HD camera take vast memory. So, with Image Compress, you can compress your images up to 10 times.

Best Sites to Compress Images on Android

Well, plenty of websites can compress images without losing quality. However, not all those are responsive. So, here are some of the best responsive sites you can visit to compress images on Android.

1. TinyPng
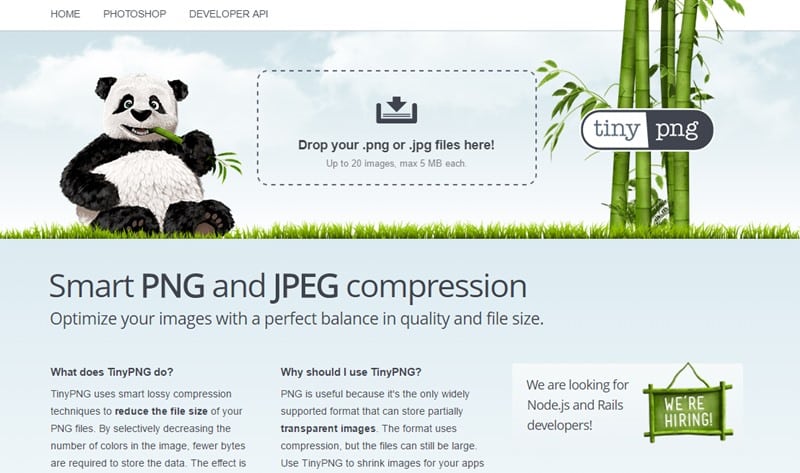
TinyPng

TinyPNG is one of the leading websites and is known for its lossless conversion. You can compress both PNG and JPG files through TinyPNG.

The great thing about TinyPNG is that it can shorten and cut down almost 50% of your image size. So, TinyPNG is one of the best sites you can visit from Android to compress images.

2. Compress.io
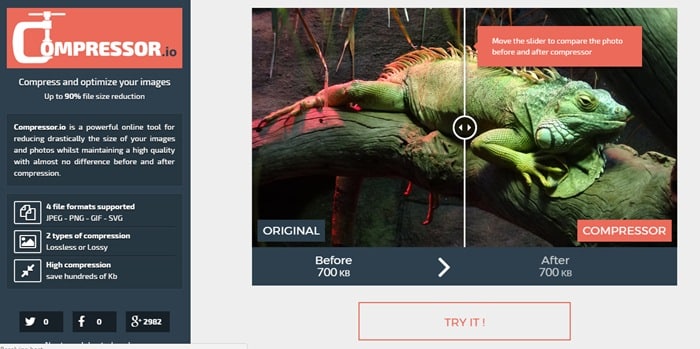
Compress.io

Compress.io is another popular image compression website that you can visit from your Android smartphone. The site can be operated via mobile devices and compresses your images while maintaining quality. So, Compress.io is the best image compression site you can visit from your Android smartphone.

3. Compress JPEG
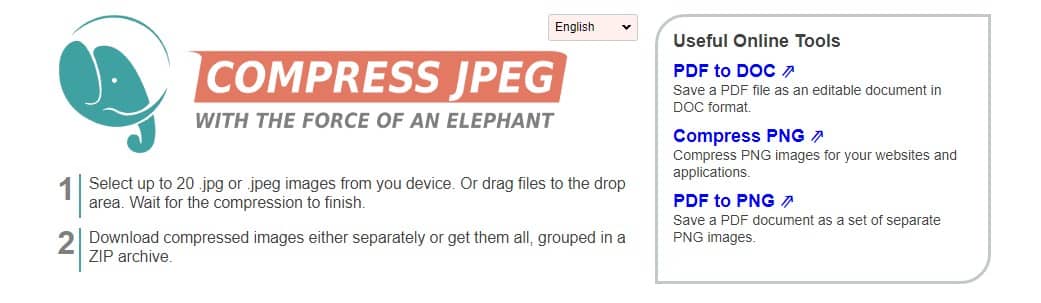
Compress JPEG

Compress JPEG is another fully responsive site you can now visit to compress images. The great thing about Compress JPEG is that it allows users to compress multiple images simultaneously. Not only that, but the compression level is also good, and you can expect lossless compression.

4. iLoveimg
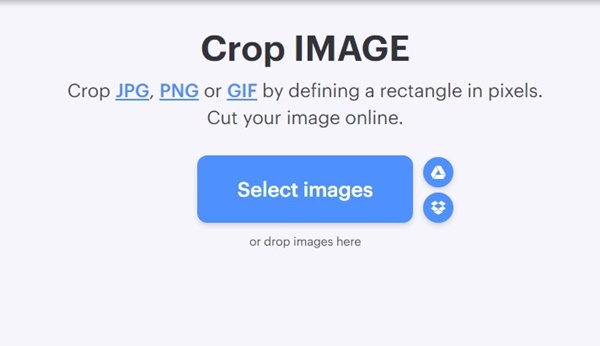
iLoveIMG

iLoveimg is another great web tool that compresses JPG, PNG, SVG, or GIF file formats. The site’s user interface is clean & lightweight, and easy to use.

To get started with iLoveimg, tap the Select Images button and upload the images you want to compress. Once selected, set the compression criteria, and you’re good to go.

Besides compressing the images, iLoveimg also provides you with other tools like an image converter, image editor, etc.

5. Compress2Go
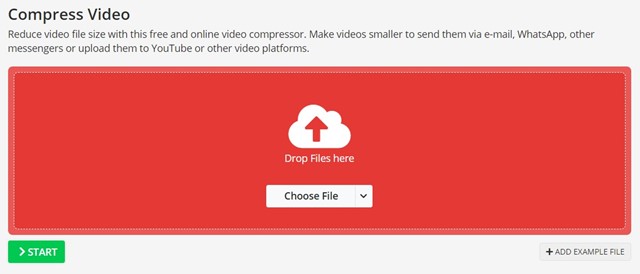
Compress Video Online

Compress2Go is another great website on the list that lets you reduce the file size of your images. This is an online image compression tool for compressing image files quickly.

The site’s interface is highly responsive, allowing you to compress images from a mobile web browser. Currently, Compress2Go only supports JPG and PNG compression.

It also provides you with different compression modes: Best Quality, Smallest File, and manual selection. If you want to compress images without visual differences, choose the best quality mode.

With these methods and apps, you can efficiently compress all the large images on your Android device and save lots of storage space. So, preserve your memory and increase your Android performance. I hope you like our work and share it with others. Leave a comment below if you have any queries related to this.

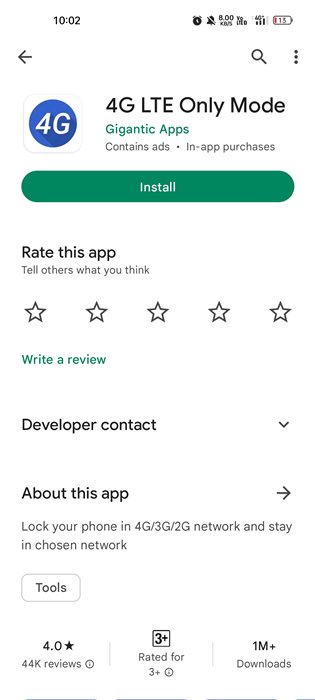
How to Force 4G LTE Only Mode on Android Devices

August 02, 2024 0

 Android devices allow you to choose network settings between 2G/3G, 2G/3G/4G, or 2G/3G/4G/5G. You must select the second or third option to use the 4G network. Modern Android smartphones support 4G and even 5G, but they don’t have a dedicated mode for 4G.

The problem is that your phone will switch network mode every few minutes if you live in an area without a strong network signal. It will automatically switch to the strongest network based on location to avail better calling & SMS features.

While the automated switching between the networks is useful because you don’t need to scan and select the available network manually, it has some drawbacks. What if you want to use only the internet and want faster speed? In that case, you need to switch to 4G only mode.

Force 4G LTE Only Mode on Android Phones

Since Android smartphones now don’t have 4G or LTE-only mode, you need to use a dedicated app. Below, we have shared a step-by-step guide on how to force 4G LTE only on Android phones. Let’s check out.

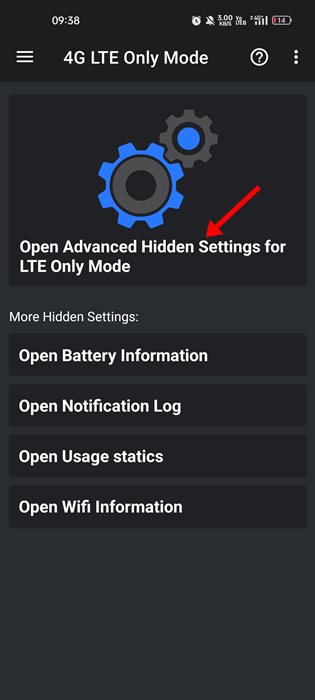
1. Open the Google Play Store and install the 4G LTE Only Mode on your Android.

4G LTE Only Mode

2. On the main screen, tap on the Open Advanced Hidden Settings for LTE Only Mode.

Open Advanced Hidden Settings for LTE Only Mode

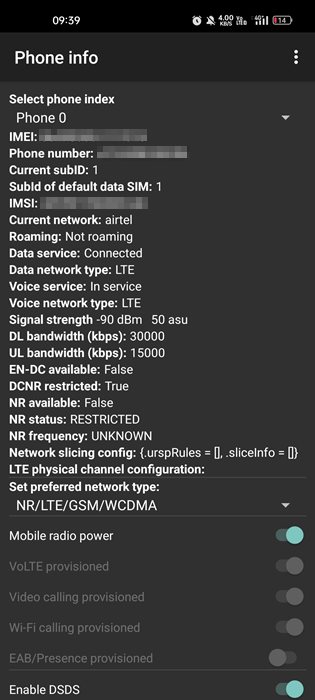
3. Now, you will see various information related to your network on the screen.

various information related to your network

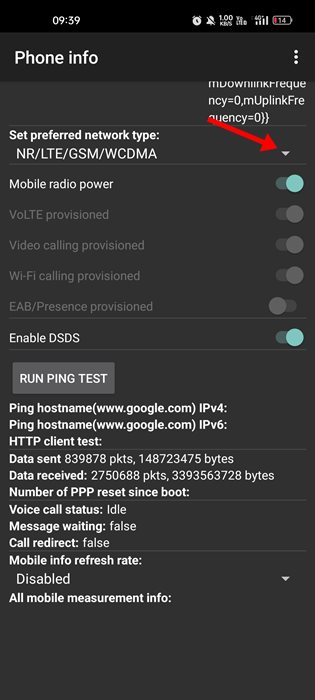
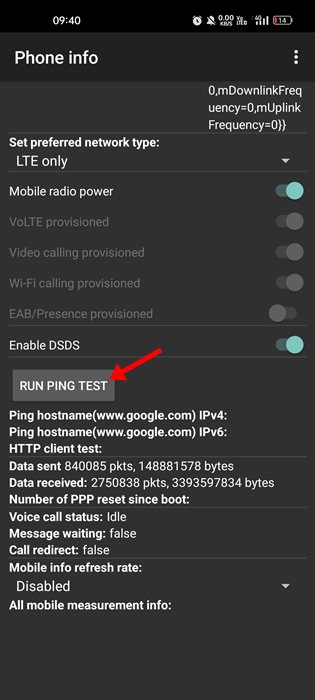
4. Next, on the Set preferred network type drop-down.

Set preferred network type

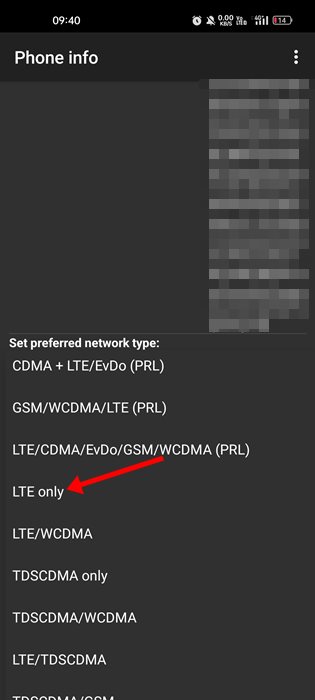
5. On the drop-down menu, select LTE Only. This will immediately switch your phone’s network to 4G LTE mode.

LTE Only

6. To check if the internet is working after switching network mode, tap on the Run Ping Test.

Run Ping Test

This is how you can force 4G LTE only mode on Android phones. The method works on both rooted and non-rooted devices.

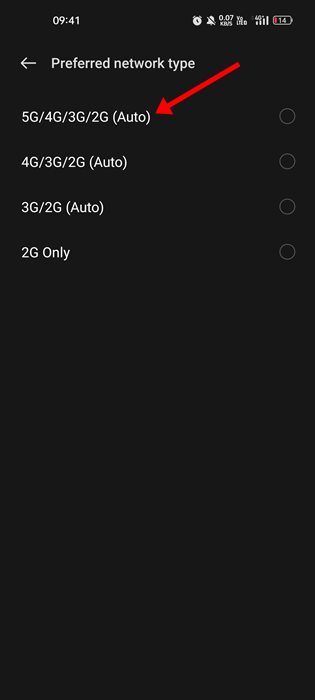
Suppose you want to switch to the auto network mode. For that, change the preferred network settings to auto on your phone.

change the preferred network settings to auto

Force 4G Only Mode via Force LTE Only App

Force 4G Only Mode via Force LTE Only App

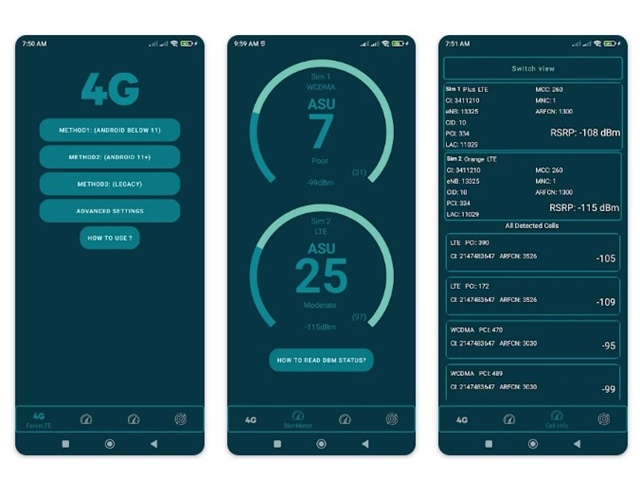
Force LTE Only is another great app that can force your Android phone to use the 4G network only. This one lets you change networks to 4G, 3G, or 2G and stay on the chosen network.

Setting up the app is also super easy: install it, open it, and select LTE from the Set Preferred network type drop-down menu.

4G Only Network Mode Code

A USSD code enables 4G Only network mode on selected Android devices. There are 4G-only network mode codes for Samsung, Realme, Huawei, and other smartphone brands.

For example, the 4G-only code for the OnePlus device is *#36446337#. You need to open your dialer, type *#36446337#, and press the dial button. Dialing the code will provide you access to the Engineering Mode. You must set 4G or LTE only in the preferred network mode.

Similarly, there’s no 4G only network mode code for Samsung devices. You need to rely on the app we have shared to switch to a 4G network only.

The universal 4G, the only network code for Realme, Huawei, etc., is *#*#4636#*#*. The USSD codes depend on your telecom operator as well. You must use the first method if none of the code works for you.

Also read: Directly Download APK from Google Play Store on PC & Android

This is how you can force 4G LTE-only mode on Android phones without root. If you need any help, let us know in the comments below.

How to Fix ‘Not Registered on Network’ Android Error (12 Methods)

August 02, 2024 0

 The ‘Not Registered on Network’ error generally appears on Samsung Galaxy and other Android-powered smartphones. It may occur while making calls, sending SMS, or using internet services.

If you have a Samsung device and are getting the same error message, don’t panic! The ‘Not Registered on Network’ error on Android smartphones can be fixed; you just need to go through some basic troubleshooting methods.

Why Does the ‘Not Registered on Network’ Error Appear?

The Not Registered on Network error can appear due to several reasons. But mainly, the error is linked to the phone being unable to connect with your network provider.If the error appears for the first time, you can restart your smartphone. However, if it appears repeatedly, you should follow some basic troubleshooting methods we will share.

Since the error message doesn’t disclose any reason for the error, you will have to follow some basic troubleshooting methods to fix it. Here are some of the best ways to fix the Not Registered on Network Android error.

1. Toggle Airplane Mode On/Off

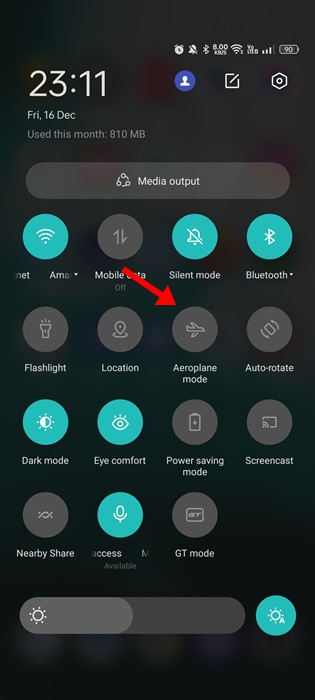
Disable the Airplane Mode

If you’ve just encountered the error message, turn Airplane Mode On and Off.

This is an evergreen solution for Android users to deal with network issues. It usually resolves the network problems without requiring any advanced steps.

To turn on/off the Airplane mode on Android, pull down the notification shutter & tap on the Airplane mode. Enabling the Airplane mode will immediately disconnect all network connections.

Once enabled, tap the Airplane Mode icon again to disable the feature and restore the network connections.

2. Restart your Android device

Restart your Phone

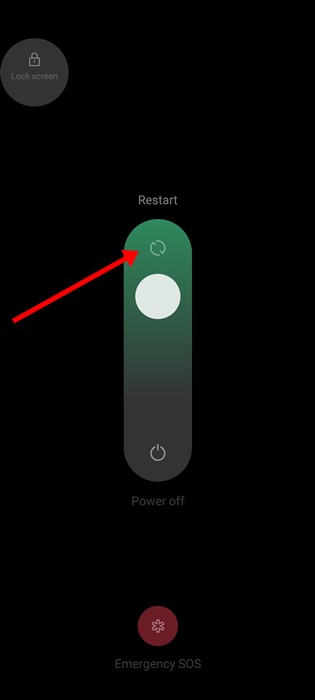
If the Airplane Mode method didn’t work in your favor, the next best thing you can do is to restart your smartphone.

Restarting is a good idea, especially if you haven’t restarted your phone for a while. This will release all processes running in the background & will release the RAM Memory.

It will also eliminate bugs and glitches that may conflict with network services. To restart your Android device, press and hold the Power button and select Restart.

3. Make sure the SIM Card is Activated

Although nowadays, a SIM card is activated within a few hours or days, the activation process can sometimes take longer.

The Not Registered on Network error simply means your Phone number has not yet been registered. So, before you try the next methods, ensure your SIM card is activated.

You can contact your service provider with another number and ask them for the activation status. If the SIM is not yet activated, you must wait a few more hours or days.

4. Reinsert your SIM Card

Reinsert your SIM Card

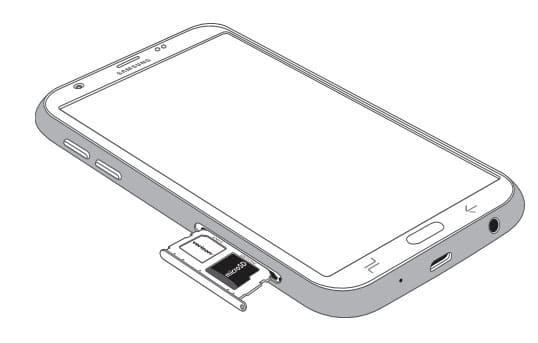
If your SIM card is activated, but you still get the ‘Not Registered on Network’ error message, it’s time to check whether the SIM card is seated correctly.

Chances are that your phone cannot read the SIM card because it’s not seated properly. So, you need to eject the SIM tray and reseat the SIM card.

5. Select the Network Manually

Due to weak signals, our phone switches signals automatically. During switching, if the phone fails to connect to the network, it shows errors.

Chances are that your phone cannot select a network automatically. So, it’s best to select your network mode to fix the issue manually.

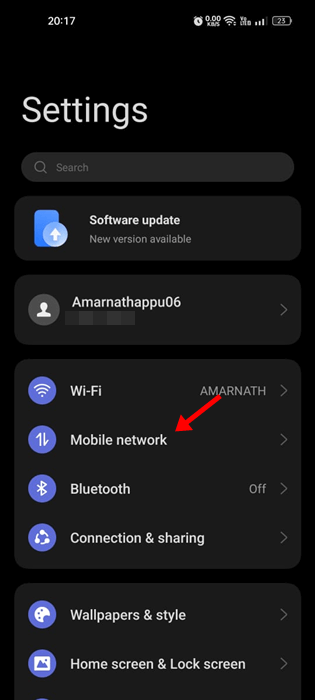
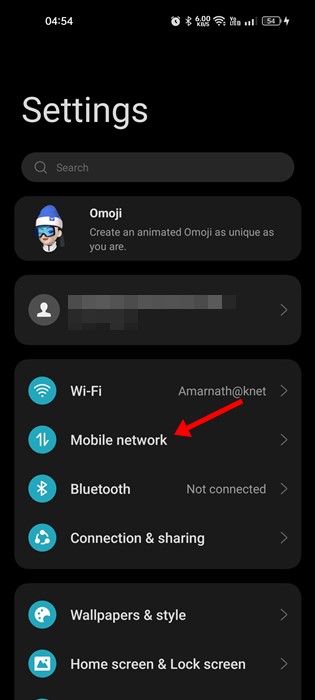
1. Open the Settings app on your Android. Now scroll down & tap on the Mobile Networks.

Mobile Networks

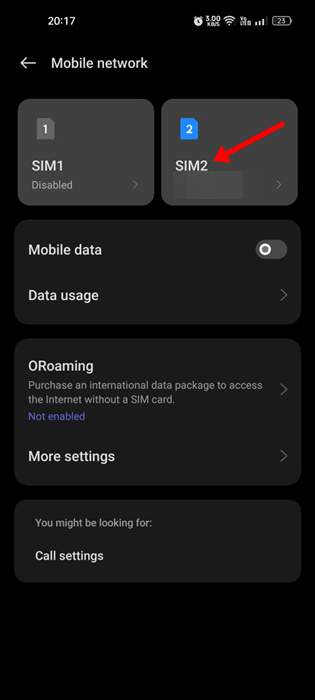
2. Select your active SIM card.

active SIM card

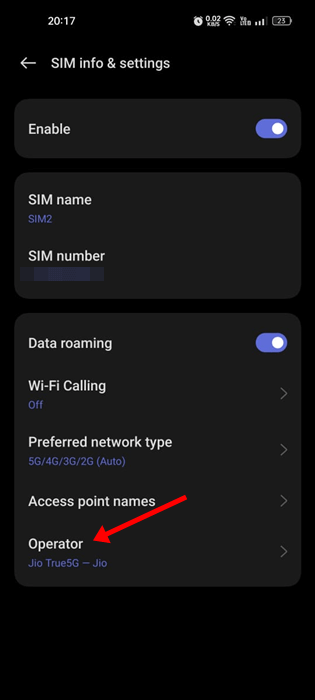
3. On the SIM info & settings, tap on the Operator.

Operator

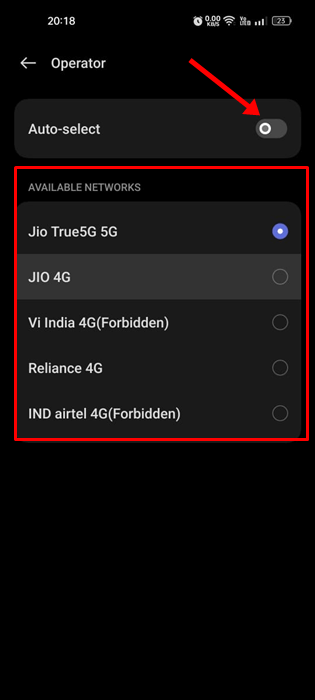
4. Turn off the Auto Select option to manually search for available networks.

manually search

5. Now select the supported network.

6. Change the Preferred Network Type

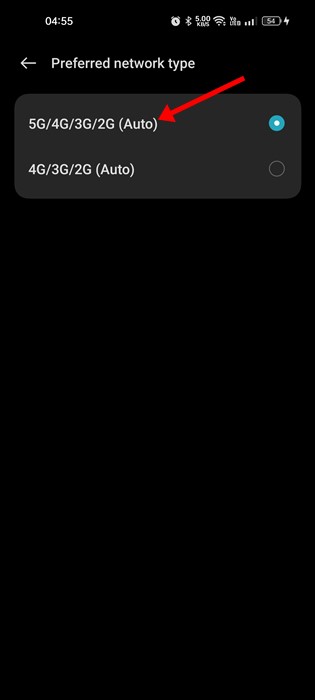
Many Android users have claimed to fix the Not Registered on Network error by changing the Preferred network type. Here’s how you can change the preferred network type on Android.

1. Open the Settings app on your Android smartphone.

2. Tap on the Mobile Networks.

Mobile Network

3. Now select your active SIM card.

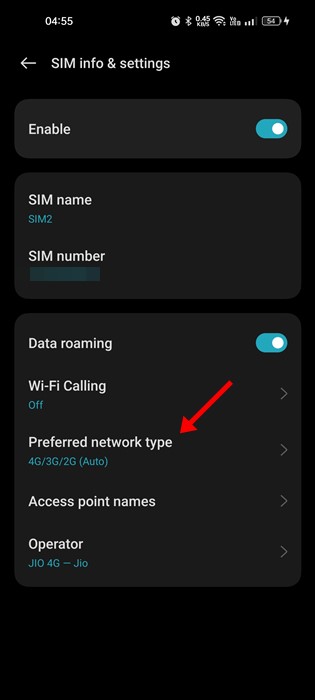
4. On the SIM info & settings, tap on the Preferred network type.

Preferred network type

5. Now select any different network type. You need to keep changing the network modes until the error is fixed.

5G/4G/3G/2G (Auto)

7. Modify the APN settings on Android

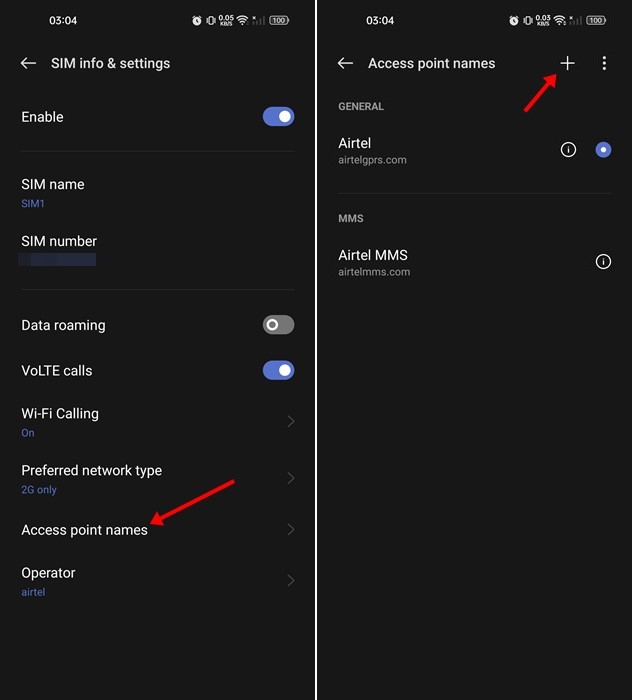
Due to incorrect APN settings, the connection to the mobile network may fail. When the connection to the mobile network fails, you see the Not Registered on Network error message. Here’s how to fix the problem.

Change APN settings on Android

  • Navigate to the Settings > Mobile Networks.
  • Select your active network.
  • On the next screen, select Access Point Names.
  • Now, edit the APN configuration to match your requirements.

You can ask your network provider to send you the APN configuration file. Or else, ask for the details and fill it manually. You can also check our guide, Best APN Settings, to know the APN settings for popular mobile network providers.

8. Reset the Network Settings

Resetting the network settings on Android is pretty easy, but you should try this if every other method has failed to fix the problem. Here’s how to reset the network settings on Android.

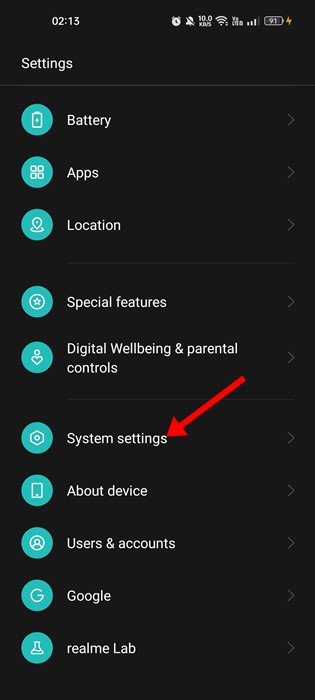
1. Open the Settings app. Scroll down and tap on the System Settings.

System Settings

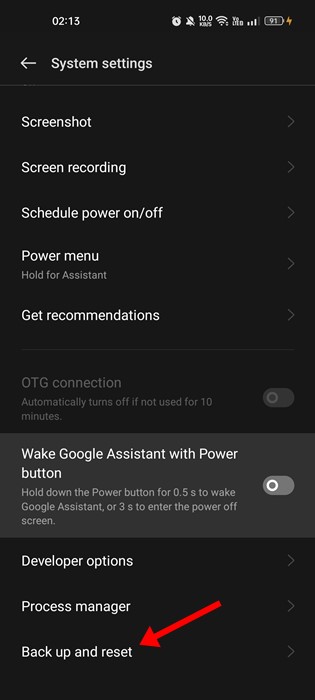
2. On the System Settings screen, tap on the Backup & Reset.

Back up and reset

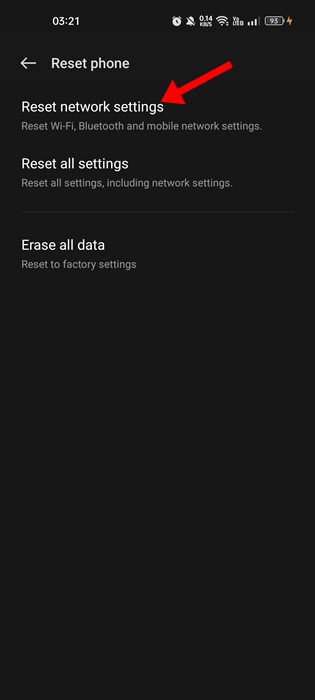
3. Now tap on the Reset Network Settings option.

Reset the Network Settings

9. Fix Not Registered on Network Error on Samsung

You need to ensure the Service mode if you have a Samsung smartphone. Here’s how to fix the ‘Not Registered on Network’ error on Samsung phones.

  • Enter *#*#4636#*#* on the Samsung Dialer.
  • On the Service Mode, tap on the Phone Information.
  • On the next screen, tap on the RUN PING TEST button.
  • Once done, tap on the Turn on radio Button.

This will fix the Not Registered on Network error on Samsung smartphones.

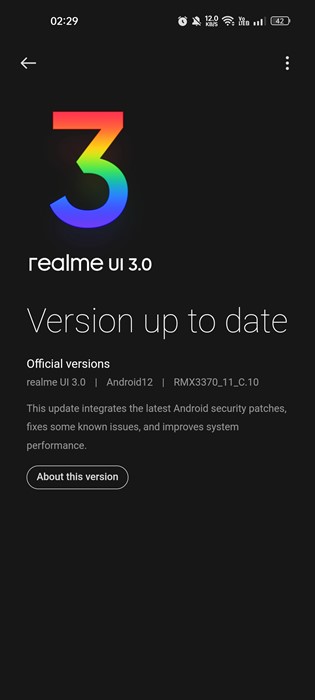
10. Update your Android Device

Keeping the Android operating system up to date is always a good idea. This way, you can enjoy the latest security patches and bug fixes as well as the new features.

Keeping Android phones up to date is always important for better security and stability. You may be getting the error just because you are using an outdated version of Android.

Hence, updating your Android version to fix the issue is recommended. Though this isn’t a sureshot fix, there’s no harm in updating the Android version.

Software update

1. Open the Settings app. Scroll down and tap on About Device.

2. On the next screen, check for the available version updates.

You need to download & install all pending updates on your smartphone.

11. Check with a Different SIM Card

If you have followed all methods but still get the ‘Not Registered on Network’ error message, it’s time to check your phone with a different SIM Card.

You can insert an active SIM card to check if your phone detects the network. Alternatively, you can try inserting the SIM card on a different smartphone. Both methods will confirm whether your SIM or phone has a problem.

If your SIM card works fine on other phones, check your phone’s hardware. On the other hand, if it doesn’t work on other smartphones, the SIM card has yet to be activated.

12. Contact your Network service provider

If your SIM card does not work on any smartphone and you’ve tried all the methods we shared, you need to contact your network service provider.

You need to call your network service provider and explain the whole issue. Tell them about the error message and the troubleshooting you’ve tried.

The technical team will investigate and resolve the issue. Resolution may take time, but it is the best thing you can do.

These are the few best ways to fix the Not Registered on Network error message on Android. If you have followed all the methods, the error is likely already resolved. Please let us know which method worked for you to fix the Network error on Android.